Roamable Support
Welcome to Roamable Support! Follow our step-by-step guides to set up and troubleshoot your eSIM on iOS and Android devices.
Get Started with a Roamable eSIM
-
Step 1: Check Compatibility
- eSIM is supported on iPhone XS, XS Max, XR, and newer models.
- To verify if your eSIM is active:
- Go to Settings > Cellular > Cellular Plans.
- If a plan is listed, your eSIM is active.
-
Step 2: Purchase an eSIM Plan
Search for your destination and purchase an eSIM plan on our website. You’ll receive a QR code via email or text depending on your preference. Keep this email/link handy to come back and check your eSIM's usage.
-
Step 3: Install eSIM
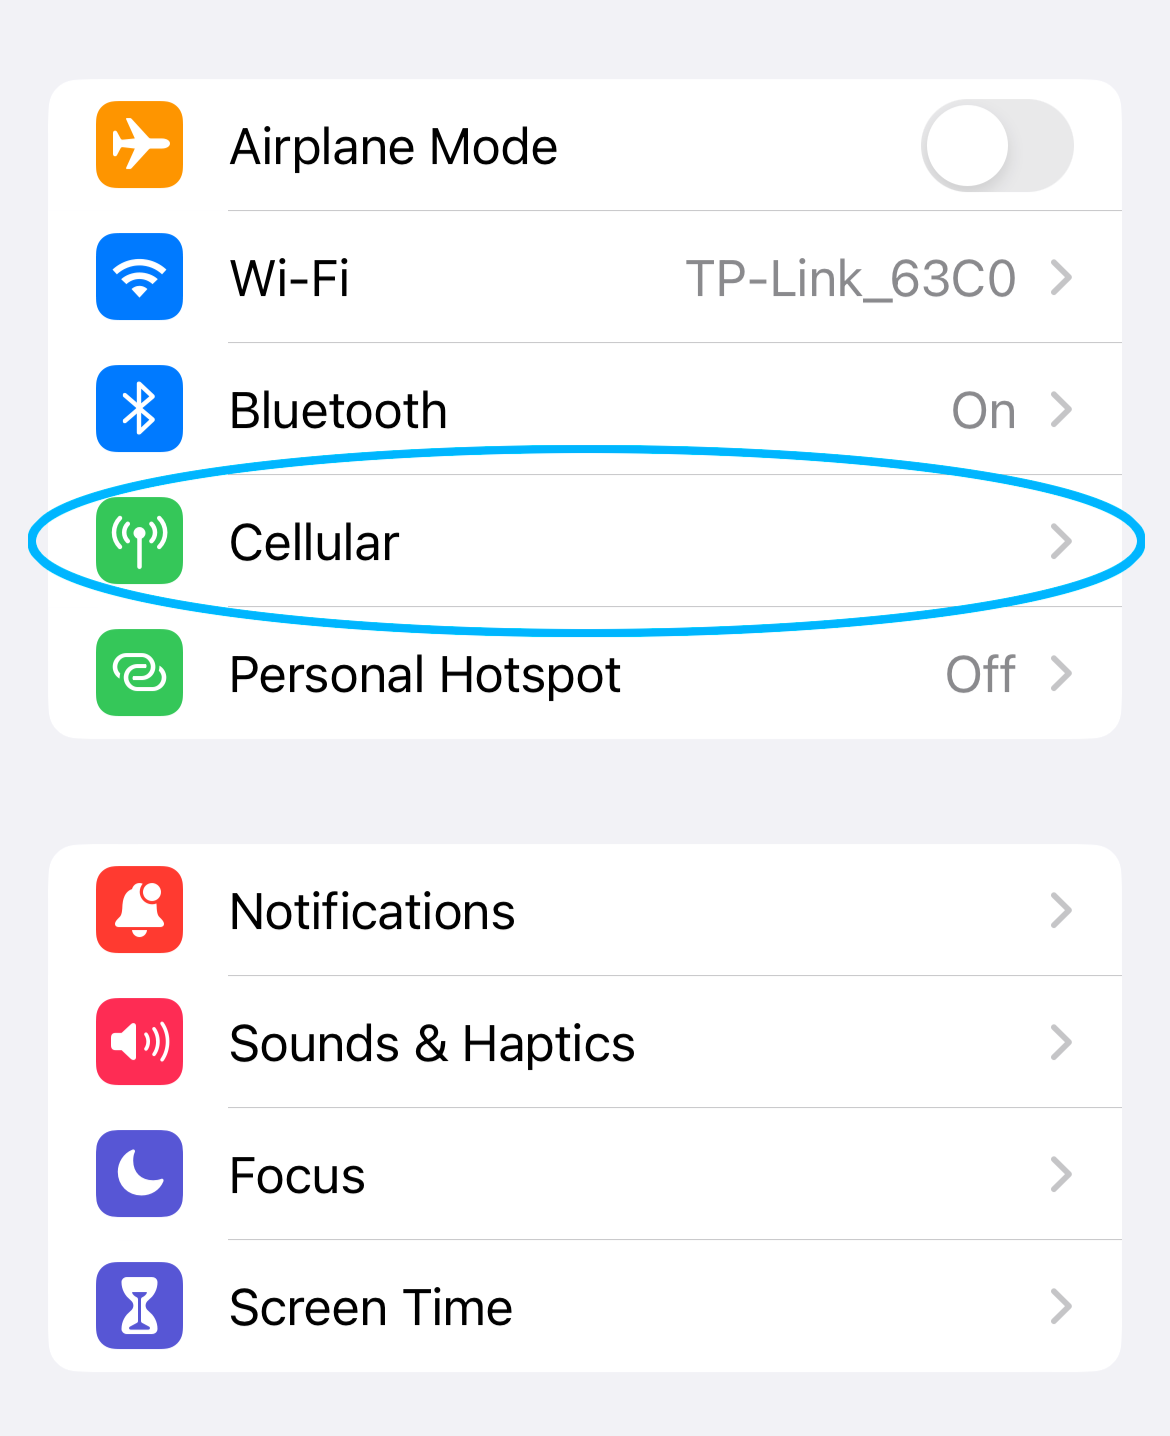
- Open Settings and select Cellular.
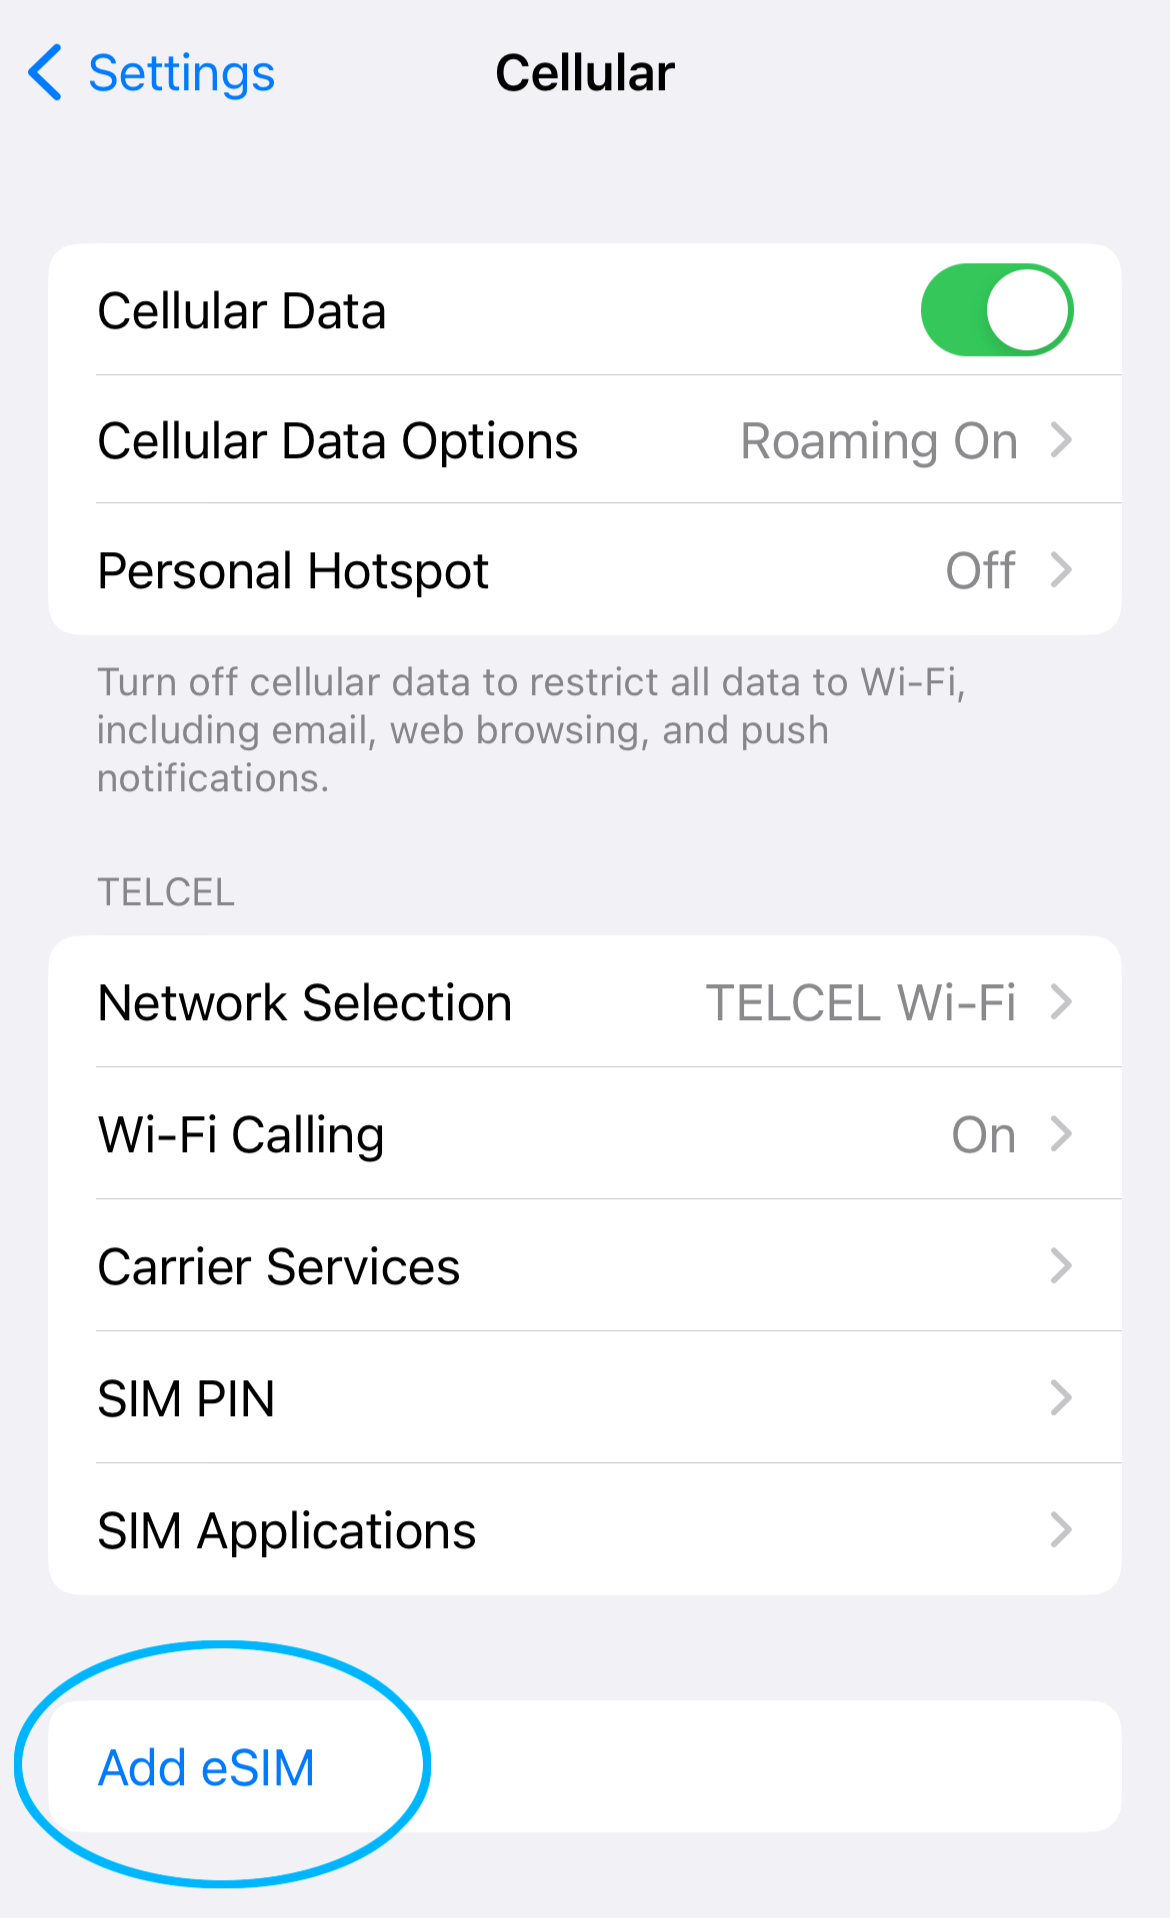
- Tap Add Cellular Plan.
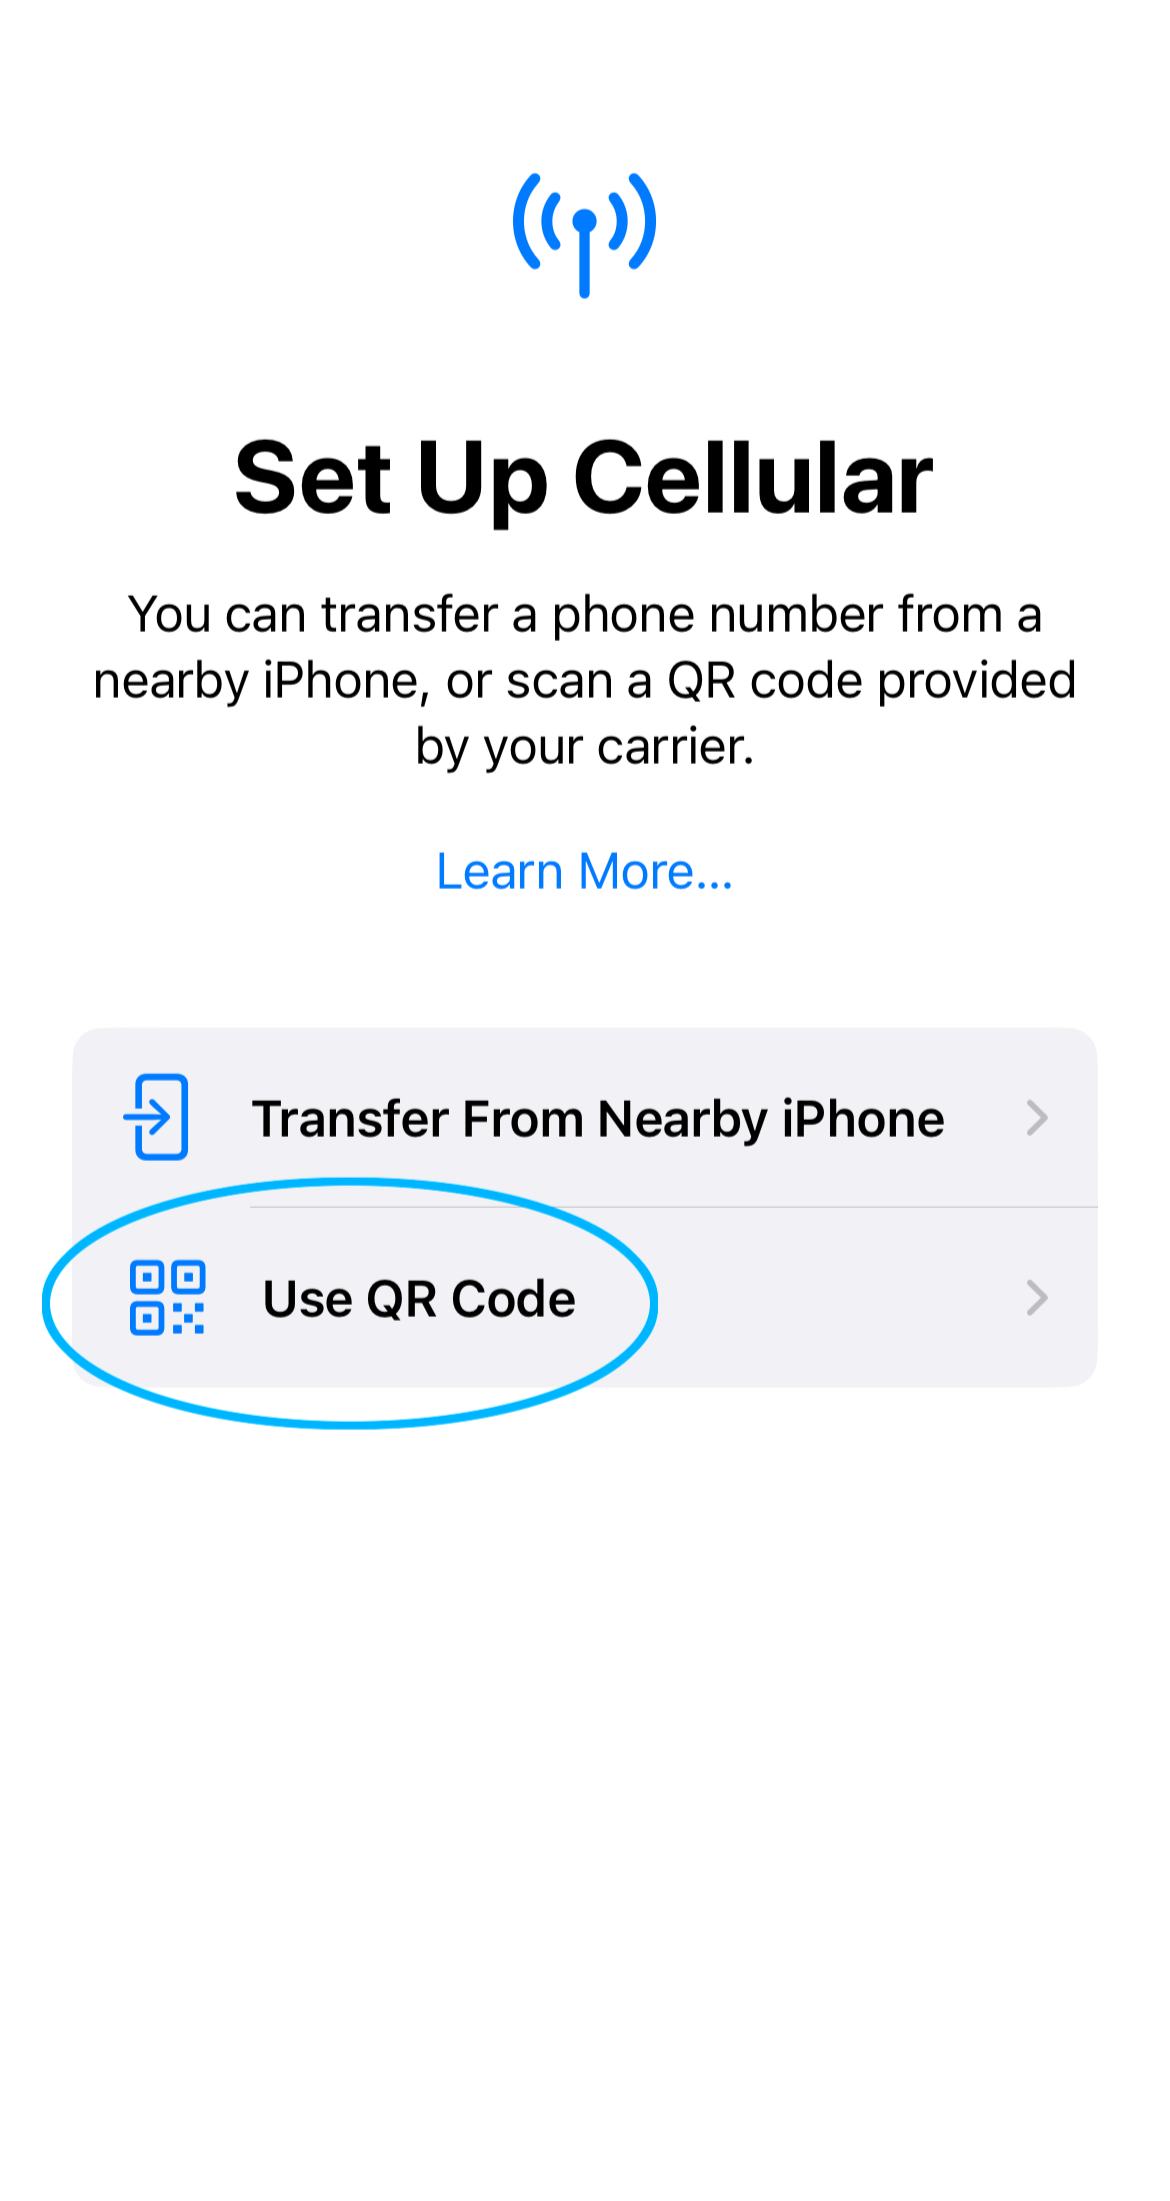
- Use your iPhone’s camera to scan the QR code or hold the QR code to activate (select devices)
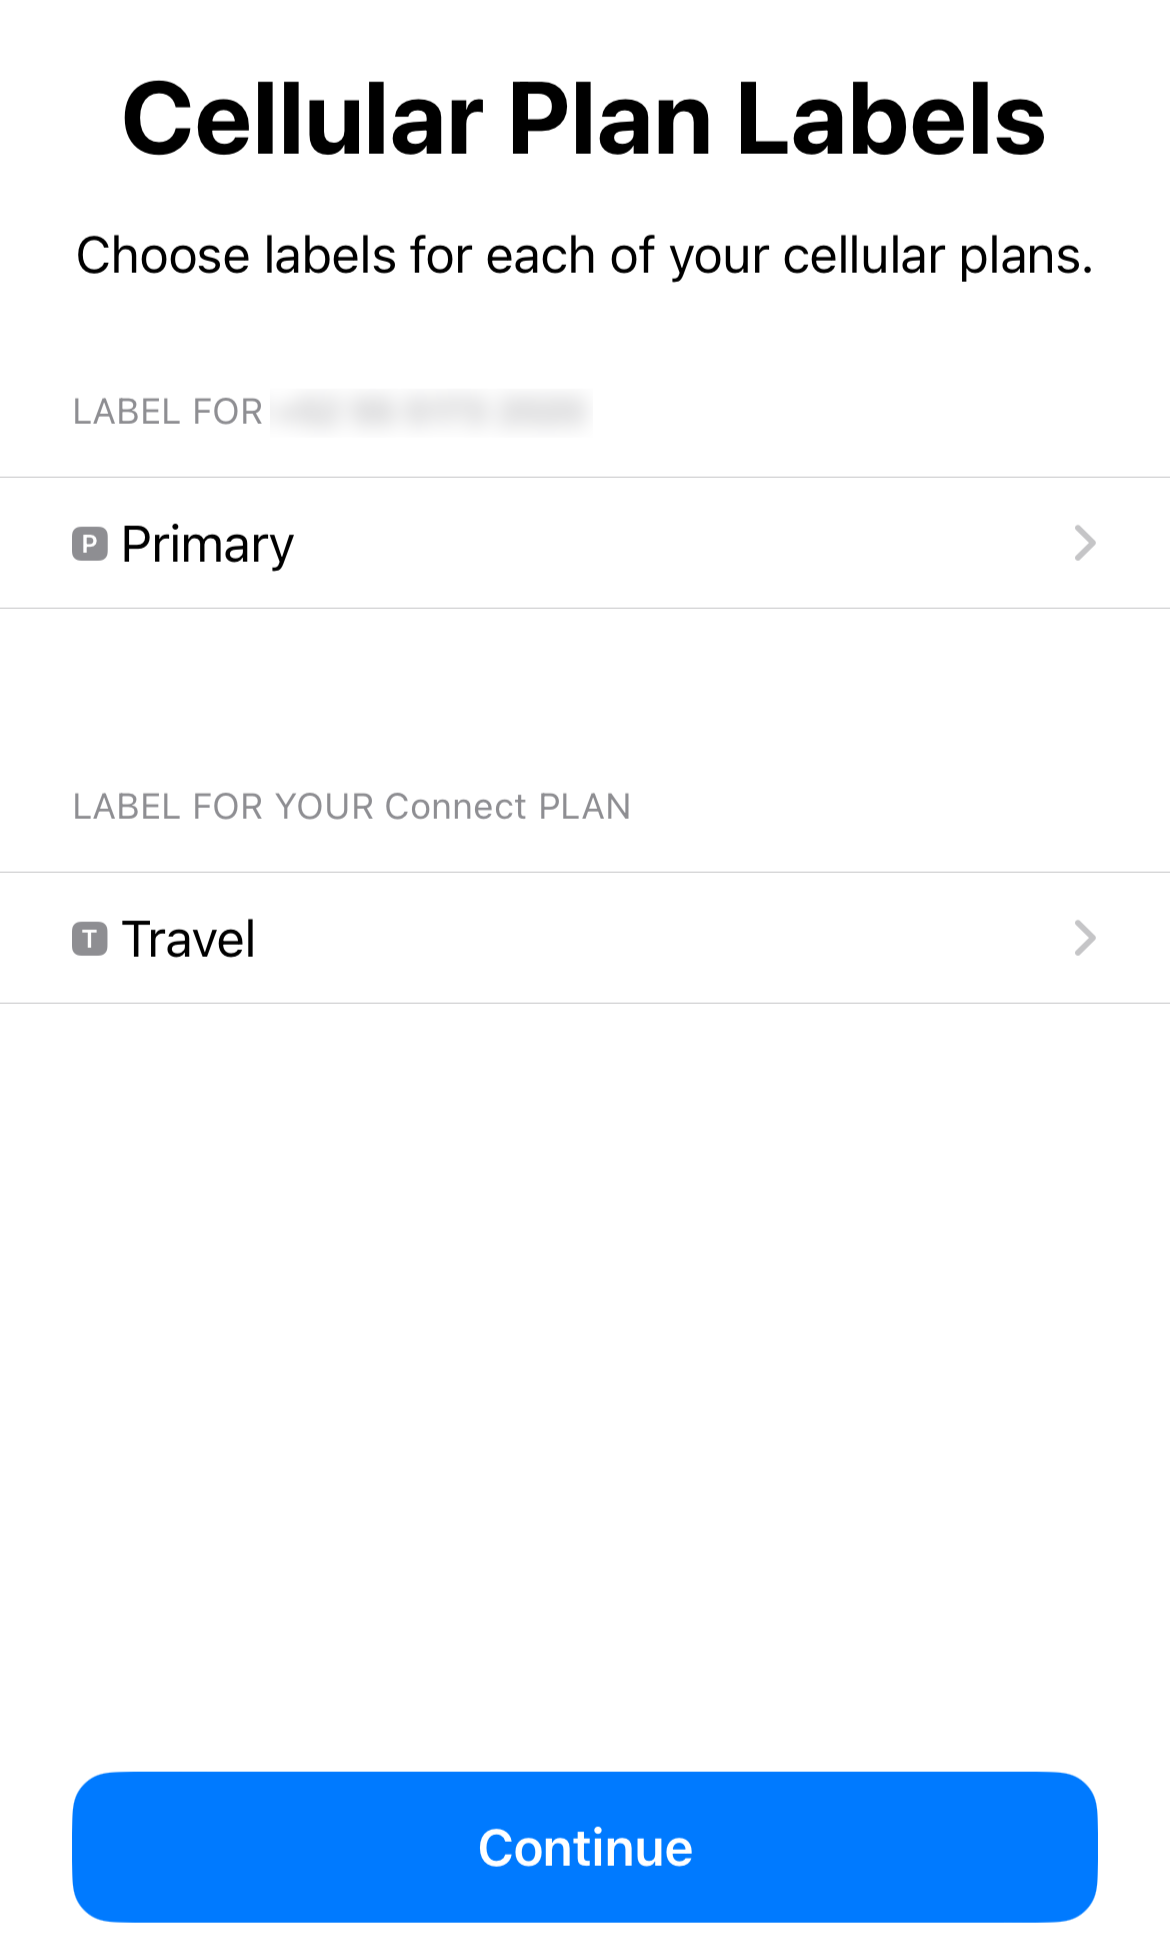
- Follow the prompts to label and complete the setup.
-
Step 4: Activate Your eSIM
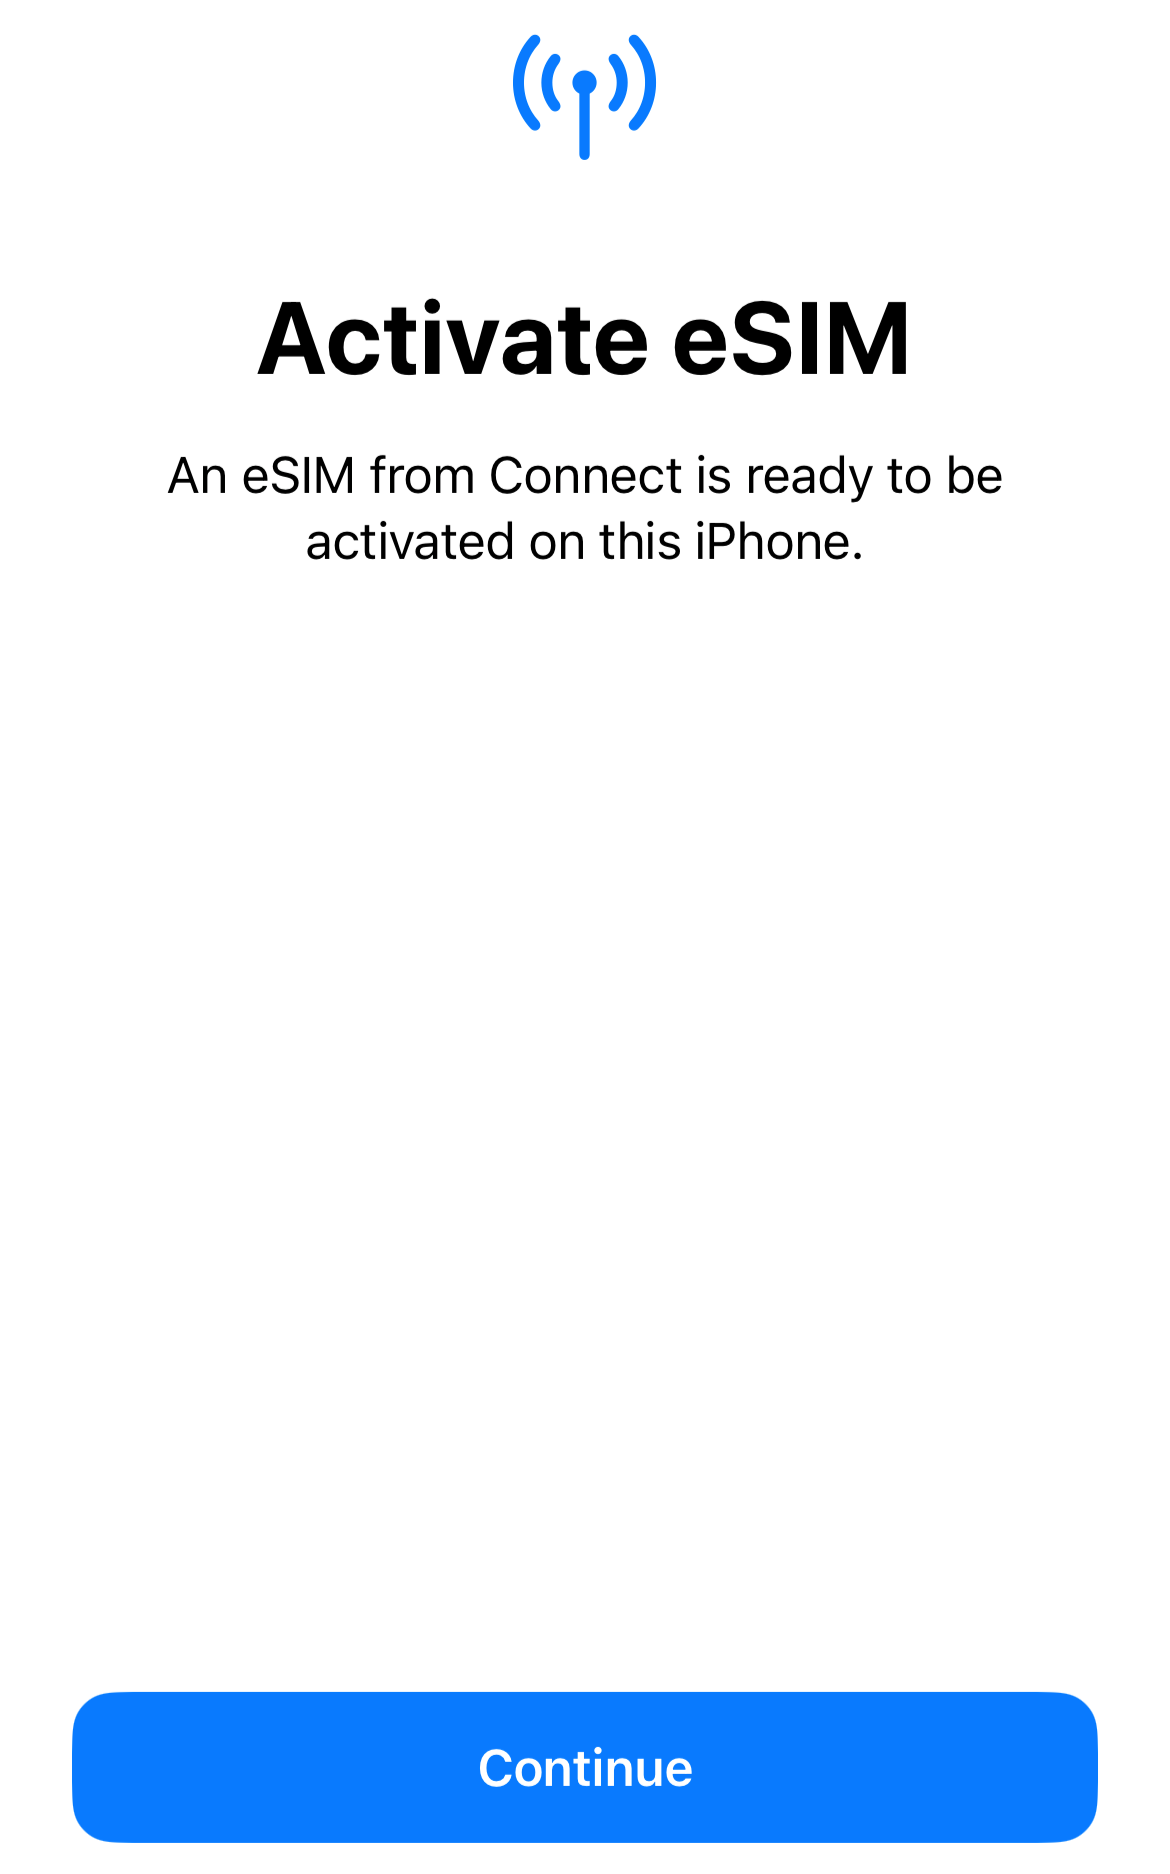
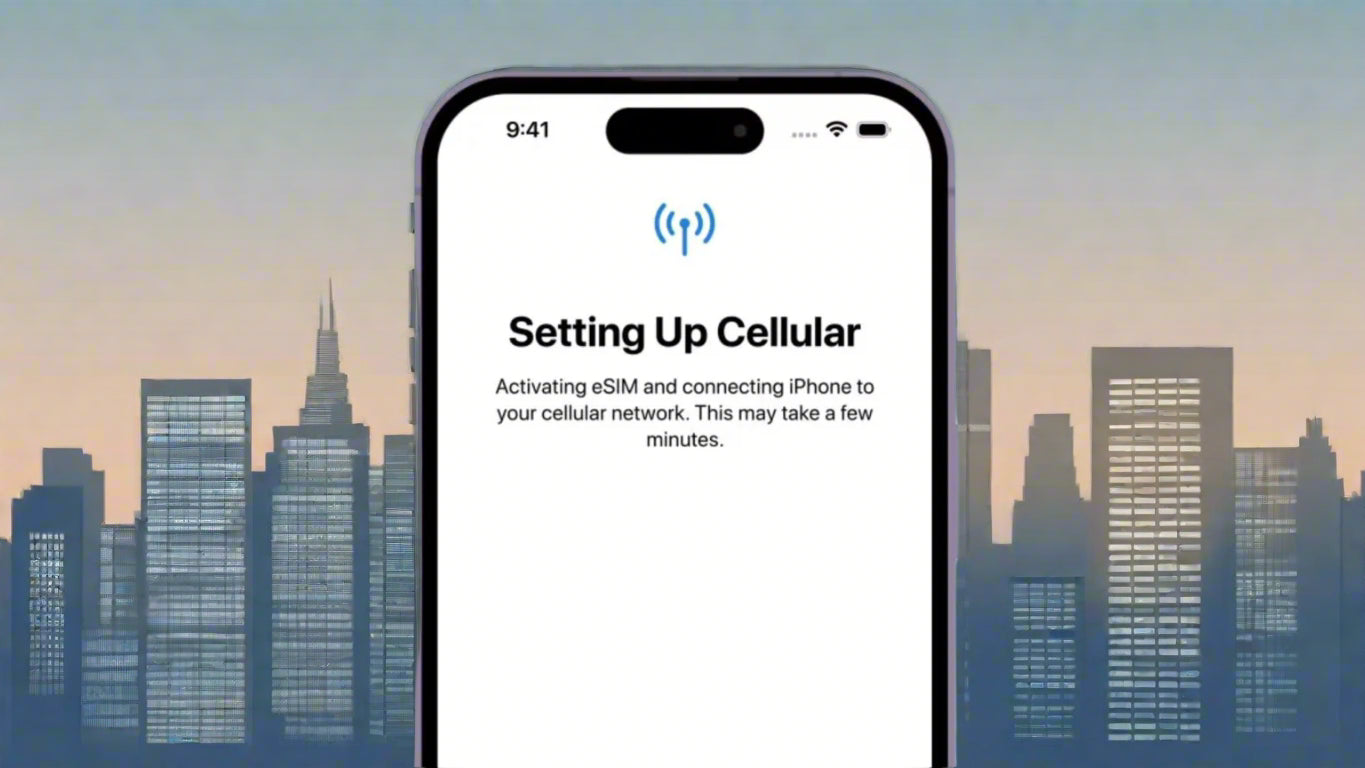
- Once the plan is added, your iPhone will activate it automatically.
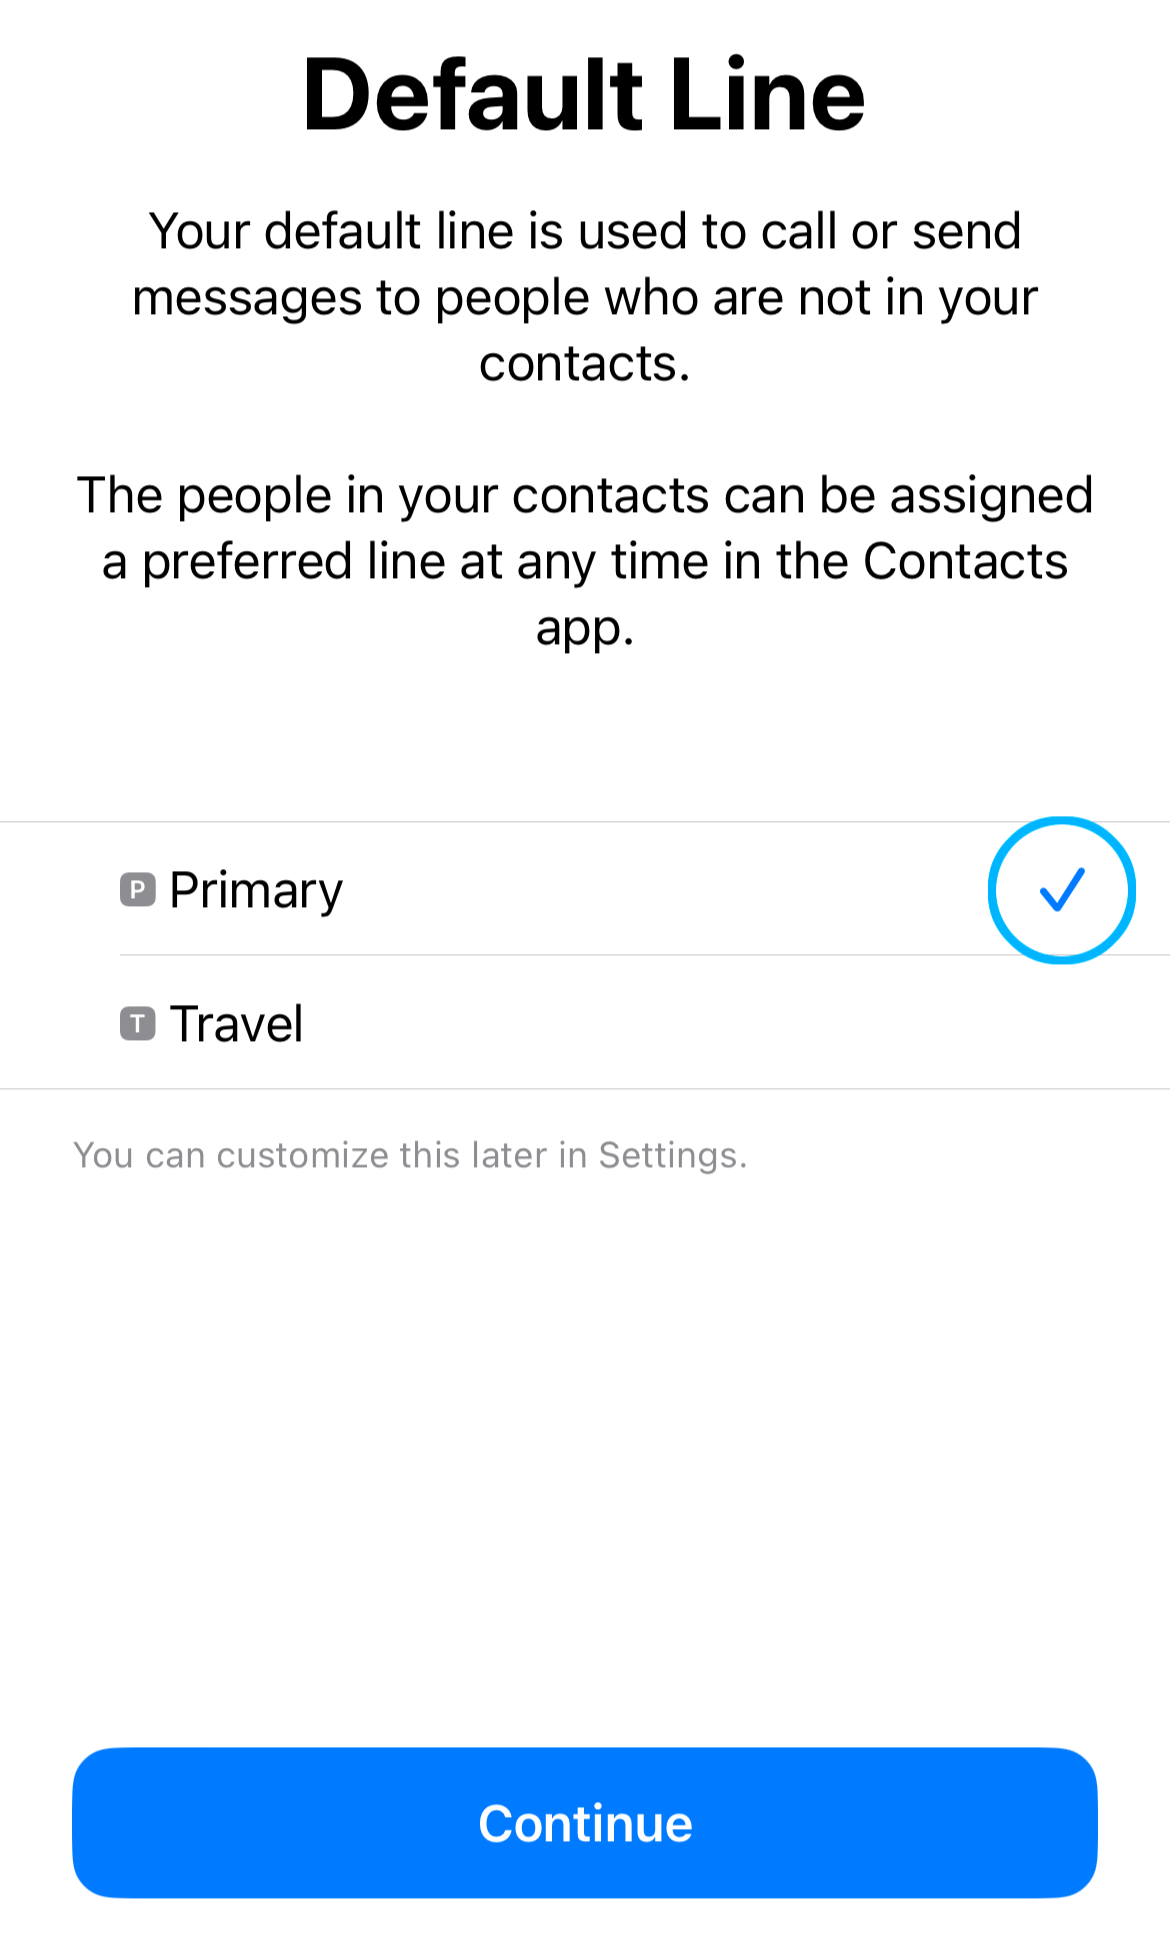
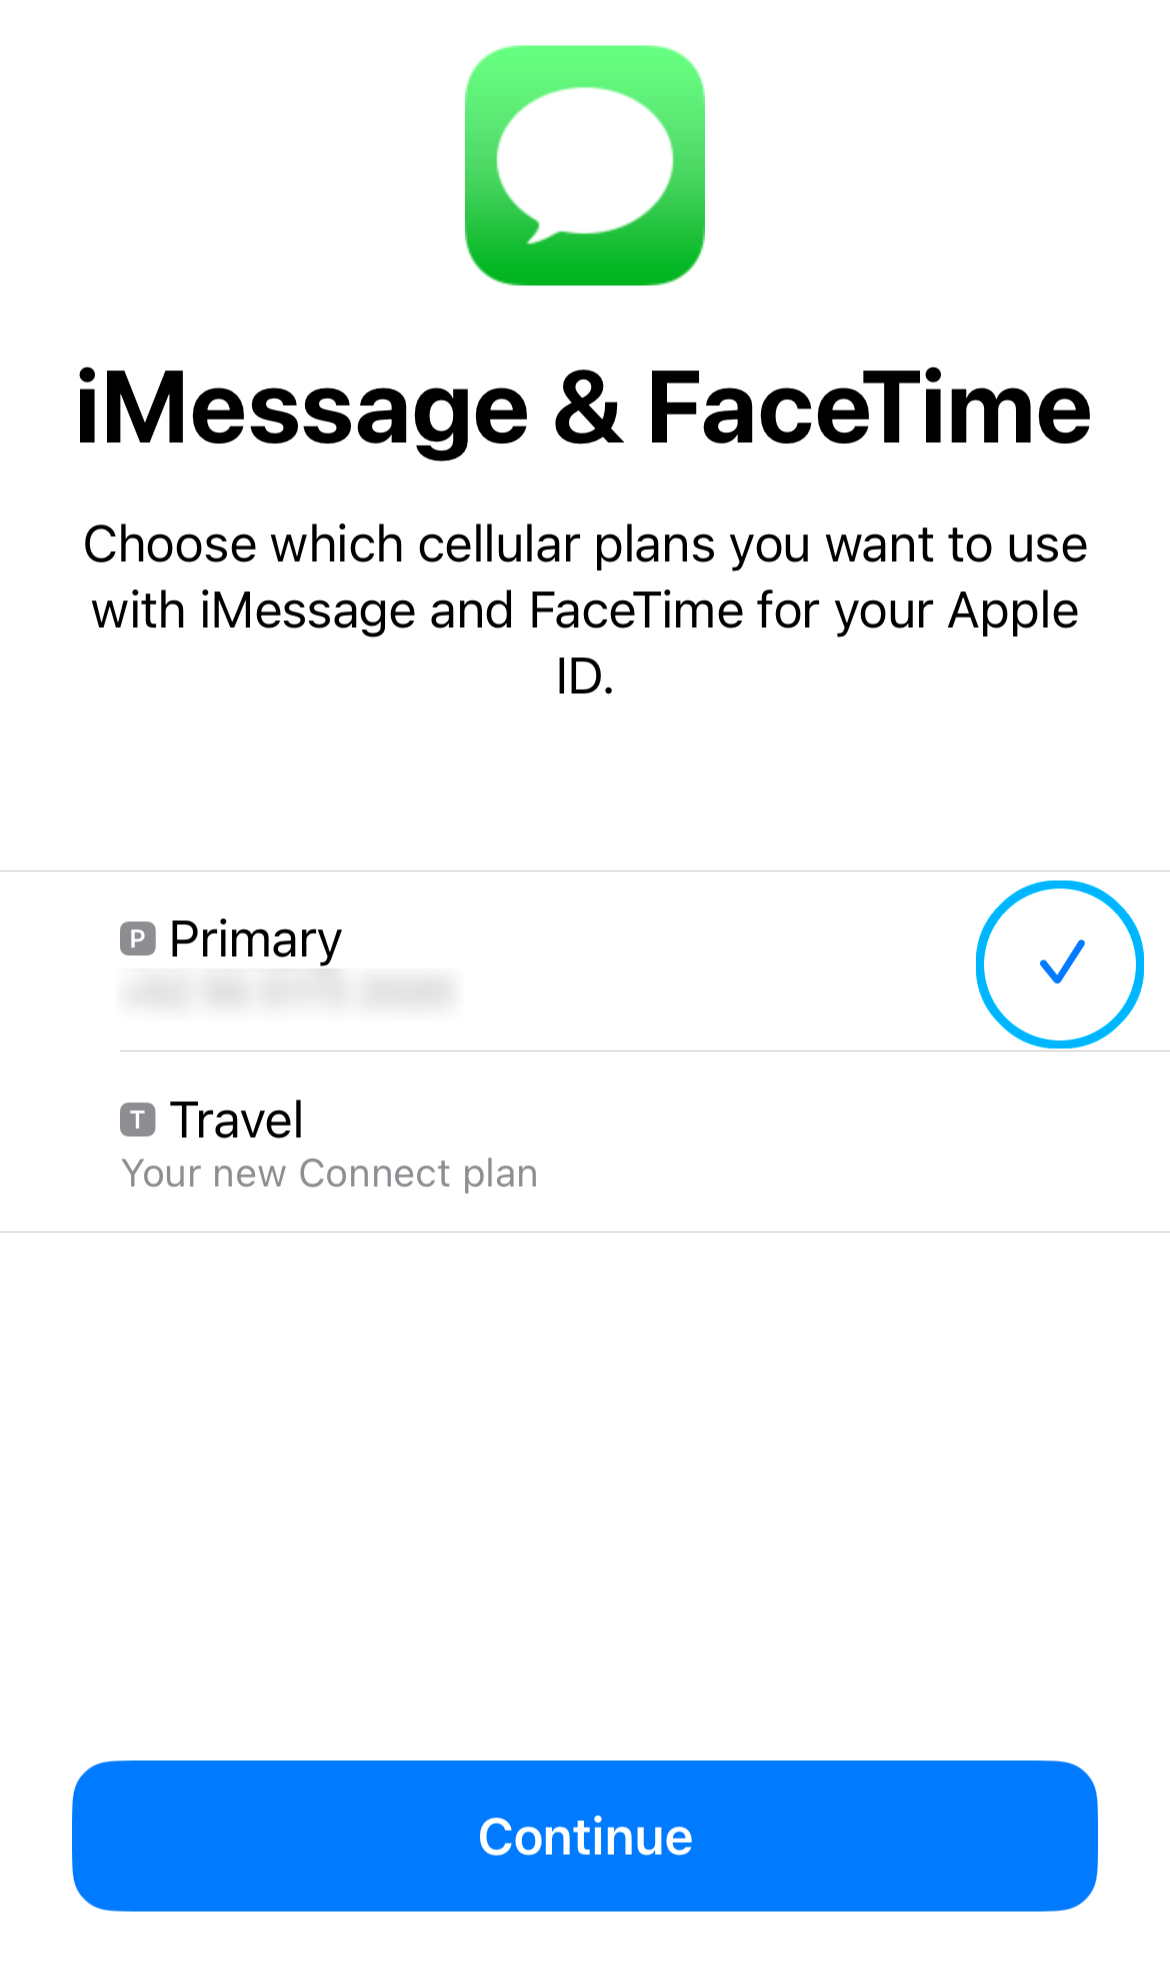
- If prompted, select which plan to use for voice, data, and messaging.
- Activation typically takes a few minutes.
Tips
- Turn off Data Roaming on your primary line (home SIM card) to avoid roaming charges.
- Temporarily disable apps like iCloud Drive, Google Sync, or other background data users.
- If you set up the eSIM before your trip, switch it to your primary cellular data plan when you arrive.
Activate eSIM on iPhone
1. Add eSIM
- Open the Camera app on your device.
- Scan the QR Code provided with your eSIM plan.
- Tap the notification labeled Data Plan.
- Follow on-screen prompts to install the plan and accept default settings.
- You can also manually input the eSIM numbers.
2. Label Your eSIM
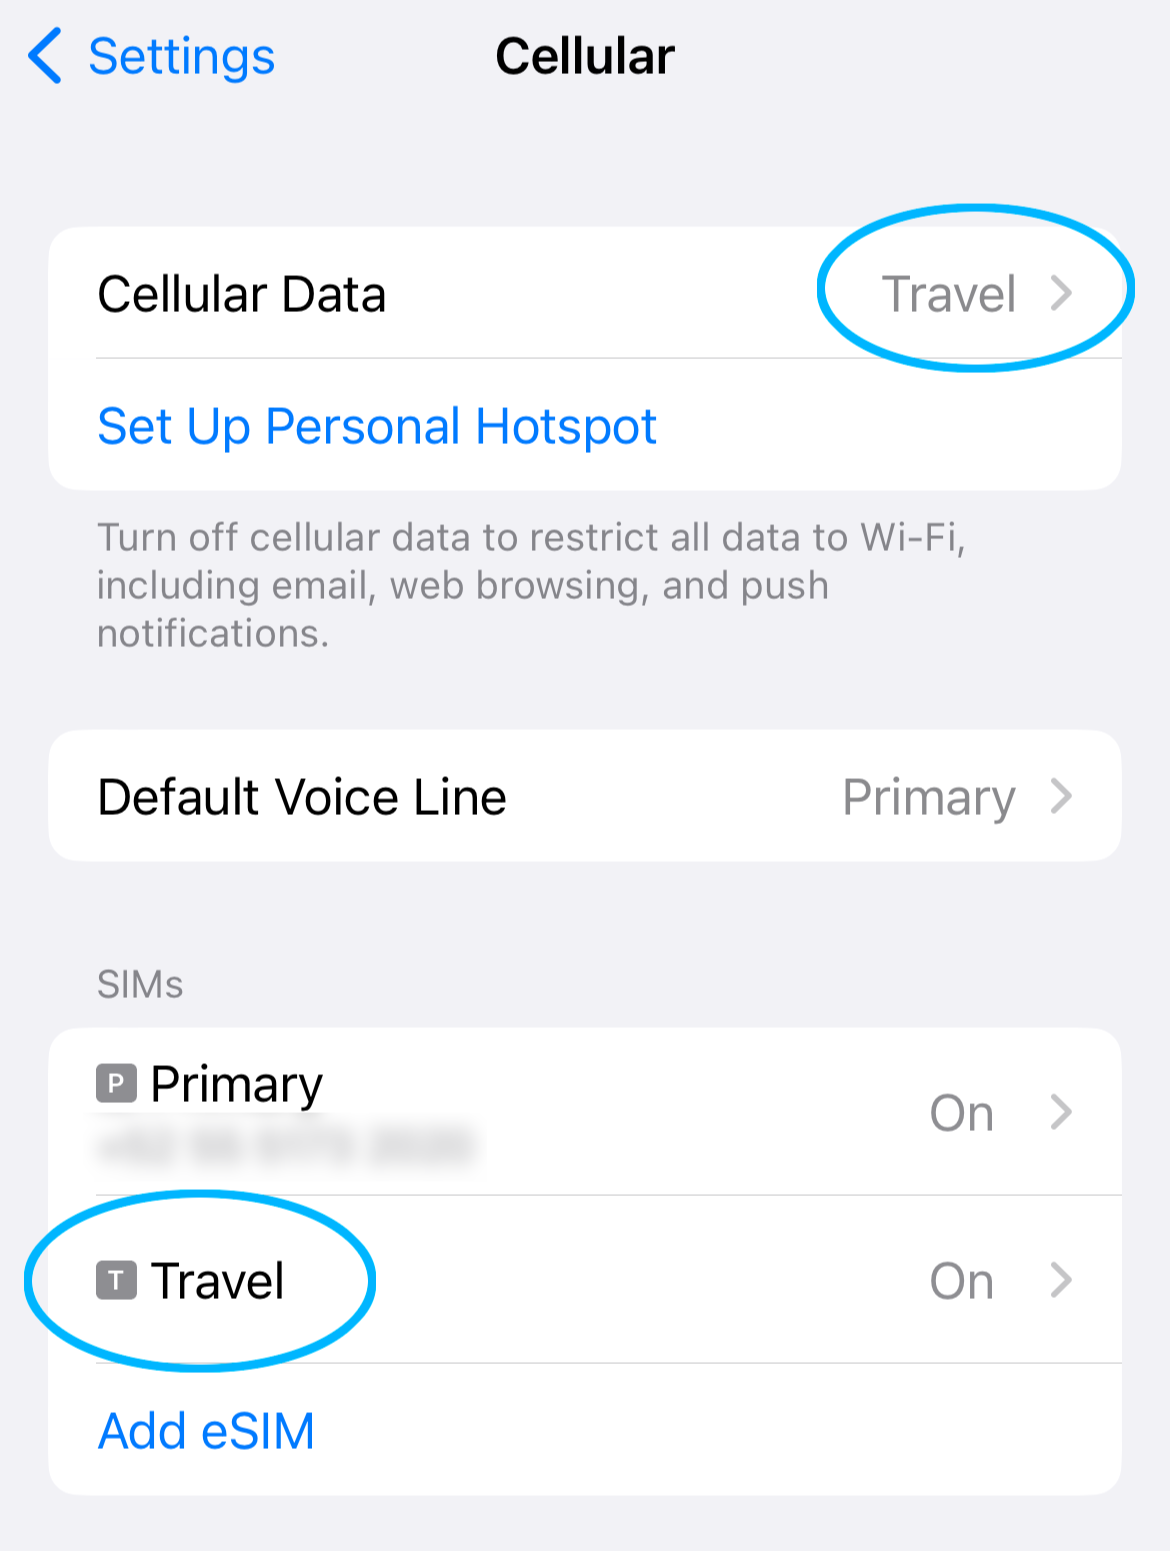
Assign a name to your eSIM plan, like “Roamable eSIM” or the name of the destination.
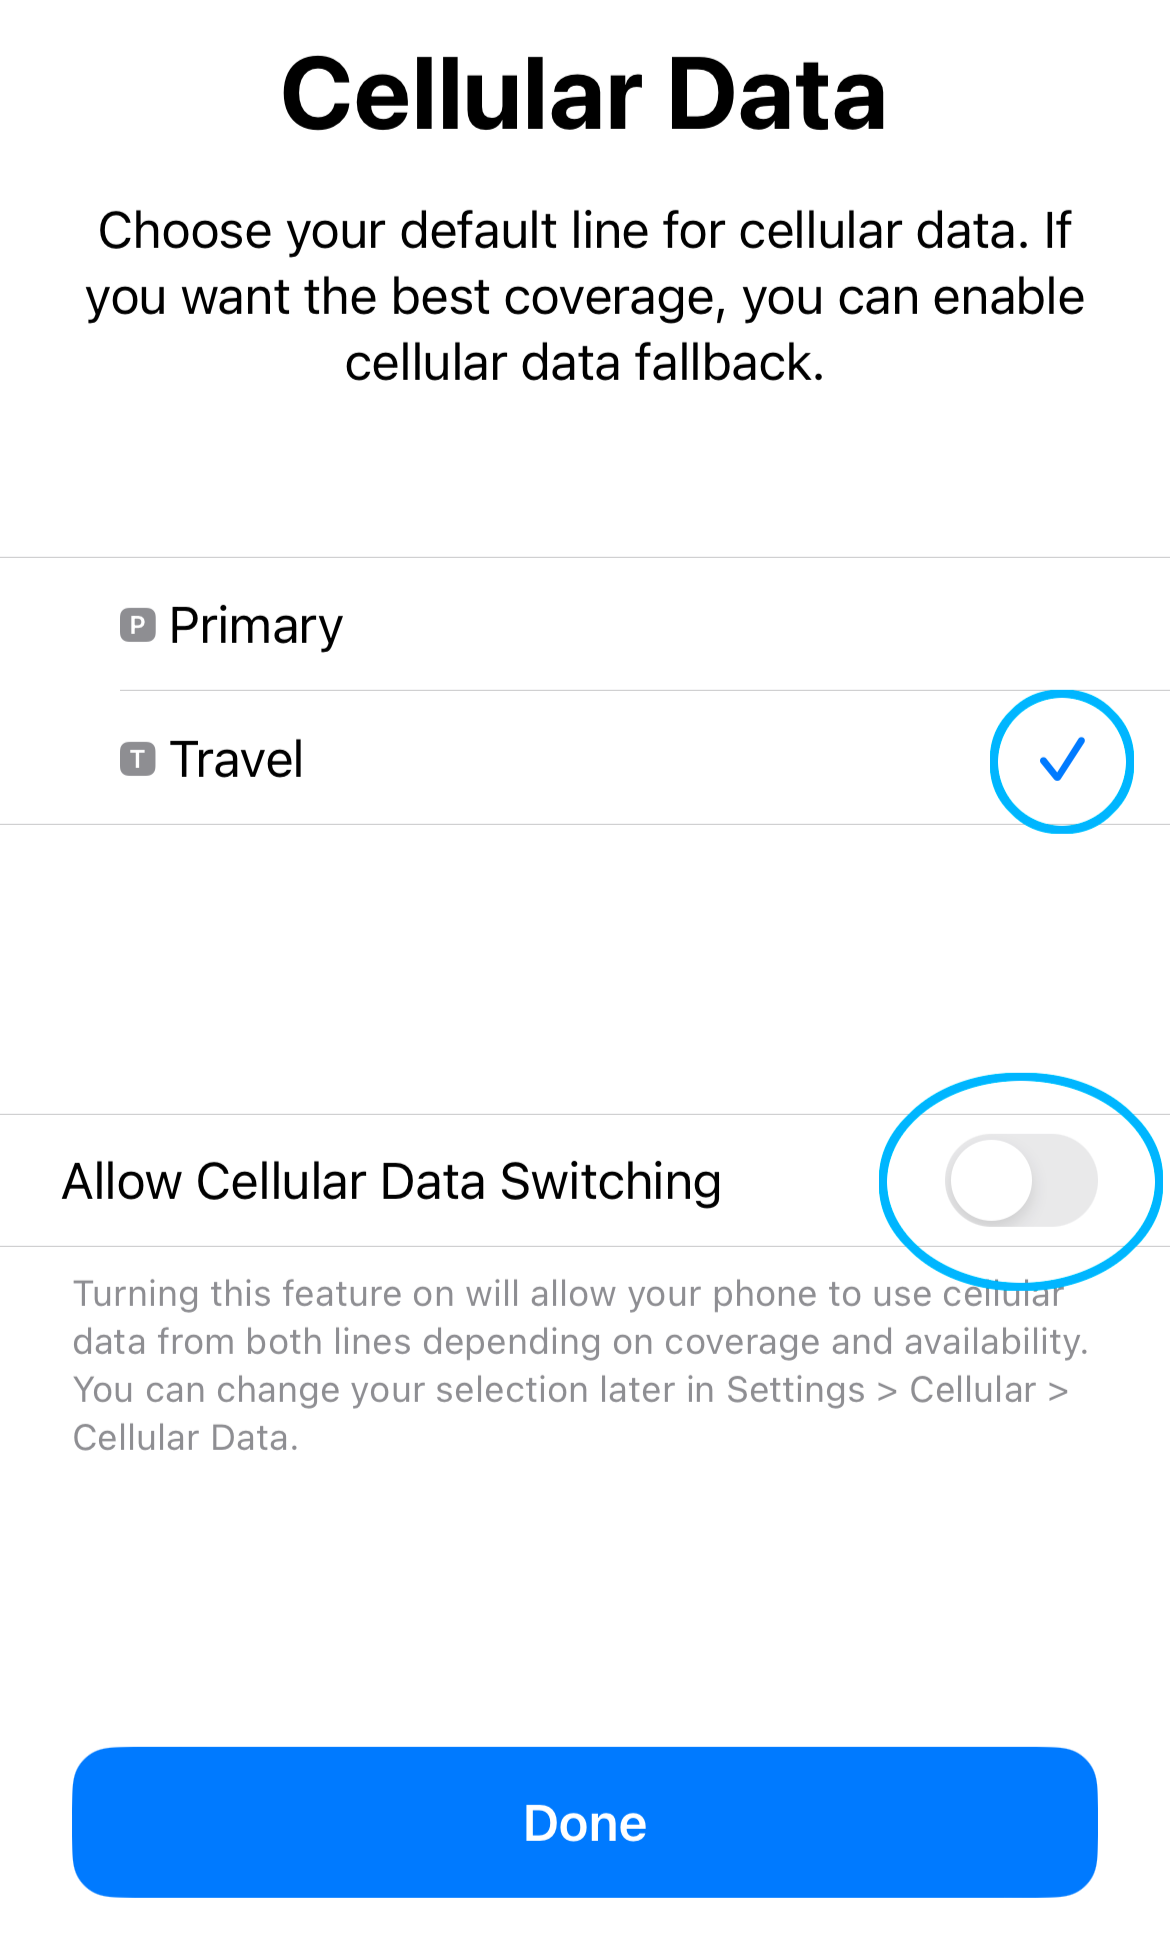
3. Choose Default Lines
- For Voice/SMS and iMessage, choose your primary SIM.
- Use the Roamable eSIM for mobile data only.
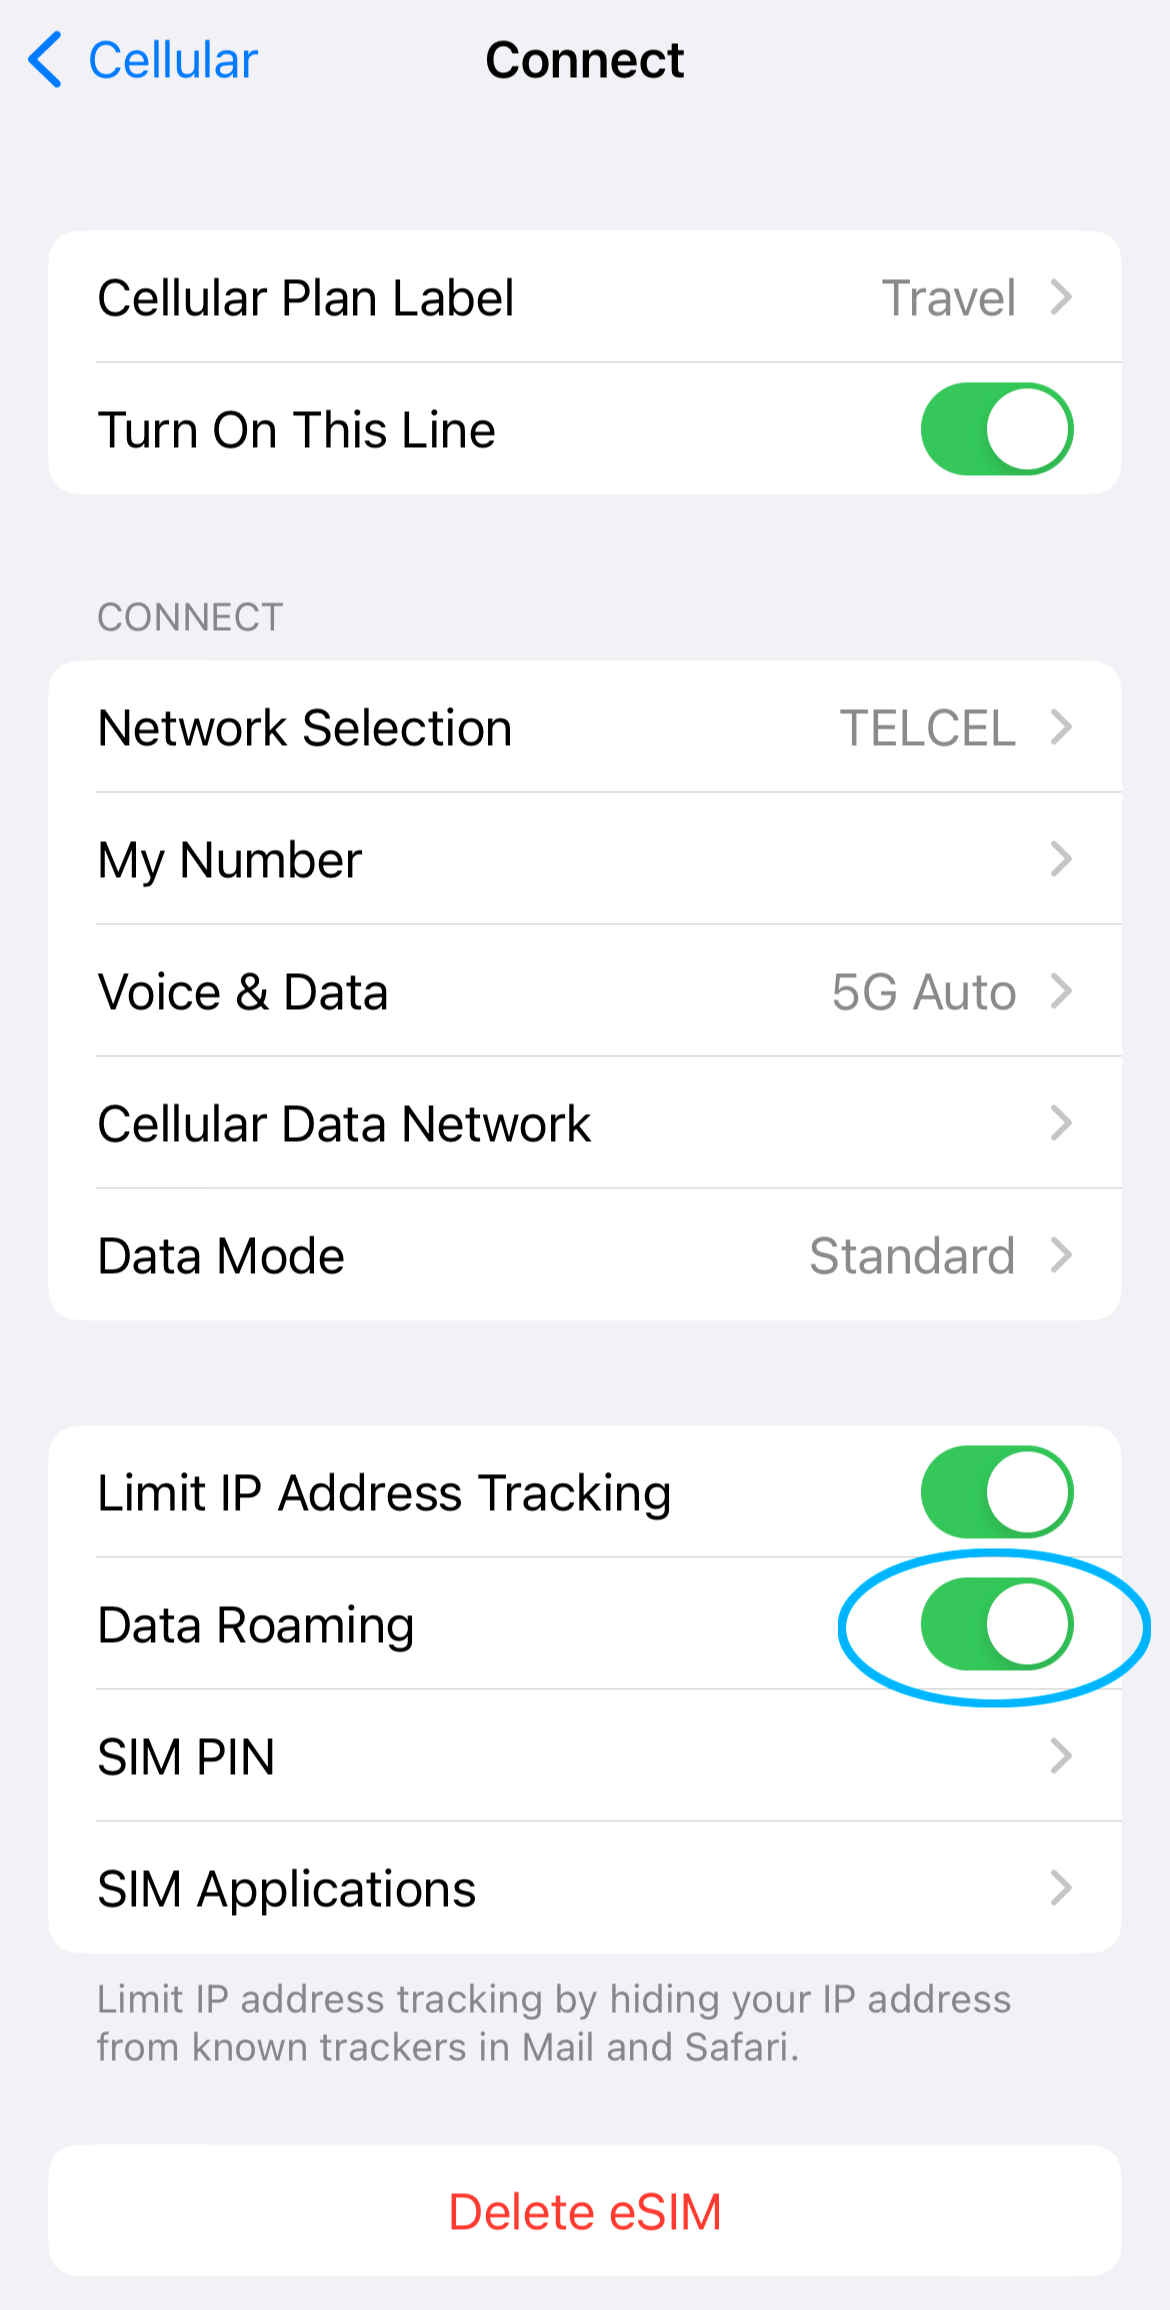
4. Enable Data Roaming
- Ensure Data Roaming is turned ON for the Roamable eSIM.
- Turn it OFF for your primary line to avoid roaming charges.
Connecting to the Internet
- After activating your eSIM, your device will search for a signal.
- In most cases, a 5G or 4G LTE connection will appear immediately.
- Rarely, it may take up to 15 minutes to establish a connection due to carrier or environmental factors.
Activate eSIM on Android
-
Step 1: Check Compatibility
- Ensure your Android device supports eSIM. Commonly supported models include Google Pixel 3 and newer, Samsung Galaxy S20 and newer, and other flagship devices.
- Check your device’s compatibility by visiting Settings > Network & Internet > Mobile Network and looking for an option to add a plan.
-
Step 2: Purchase an eSIM Plan
- Visit our website to purchase an eSIM plan. You’ll receive a QR code to activate your plan seamlessly.
-
Step 3: Install eSIM
- Open Settings and navigate to Network & Internet > Mobile Network.
- Select Add Carrier or + Add Plan.
- Use your device’s camera to scan the QR code.
- Follow the on-screen instructions to label and finalize the setup.
-
Step 4: Activate Your eSIM
- Your device will activate the eSIM automatically. If prompted, select it as the primary data plan.
- Activation typically takes a few minutes.
Need Help? Contact Us Today.
(include your order # in the comment box)

